
Modules
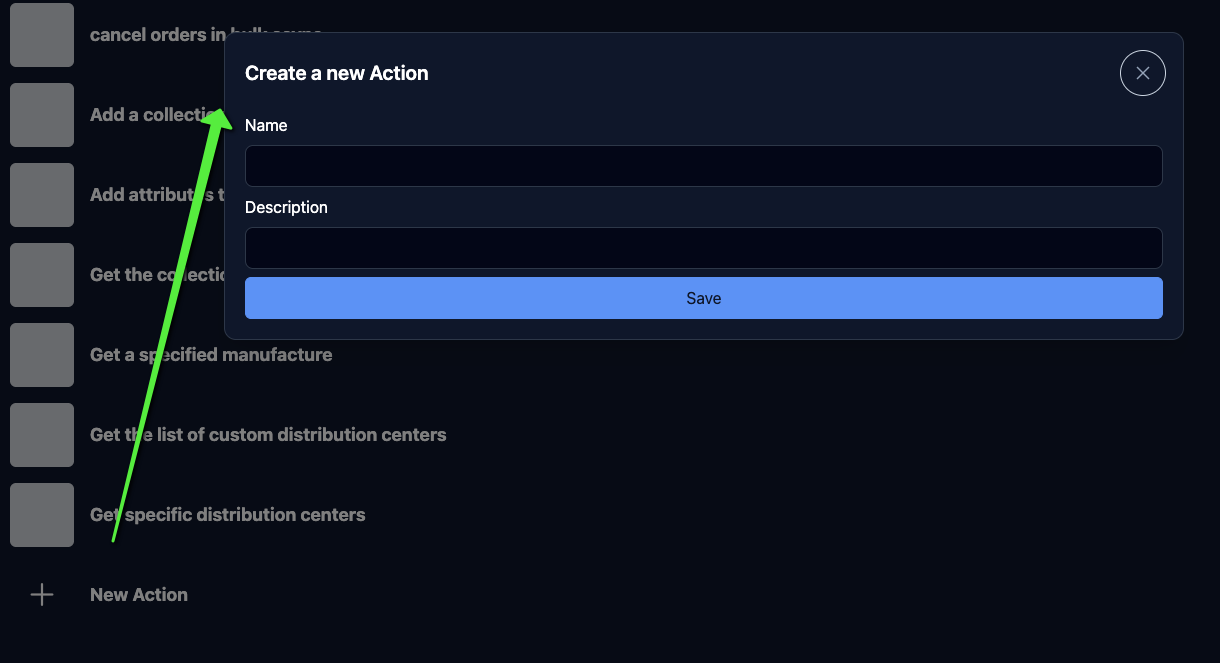
1. Create a module
Section titled “1. Create a module”For a new module, press “New module” and a window will open to define a new module for your application (if you have used a yaml, you can directly go to step 2 to modify your module).
2. Modify the module
Section titled “2. Modify the module”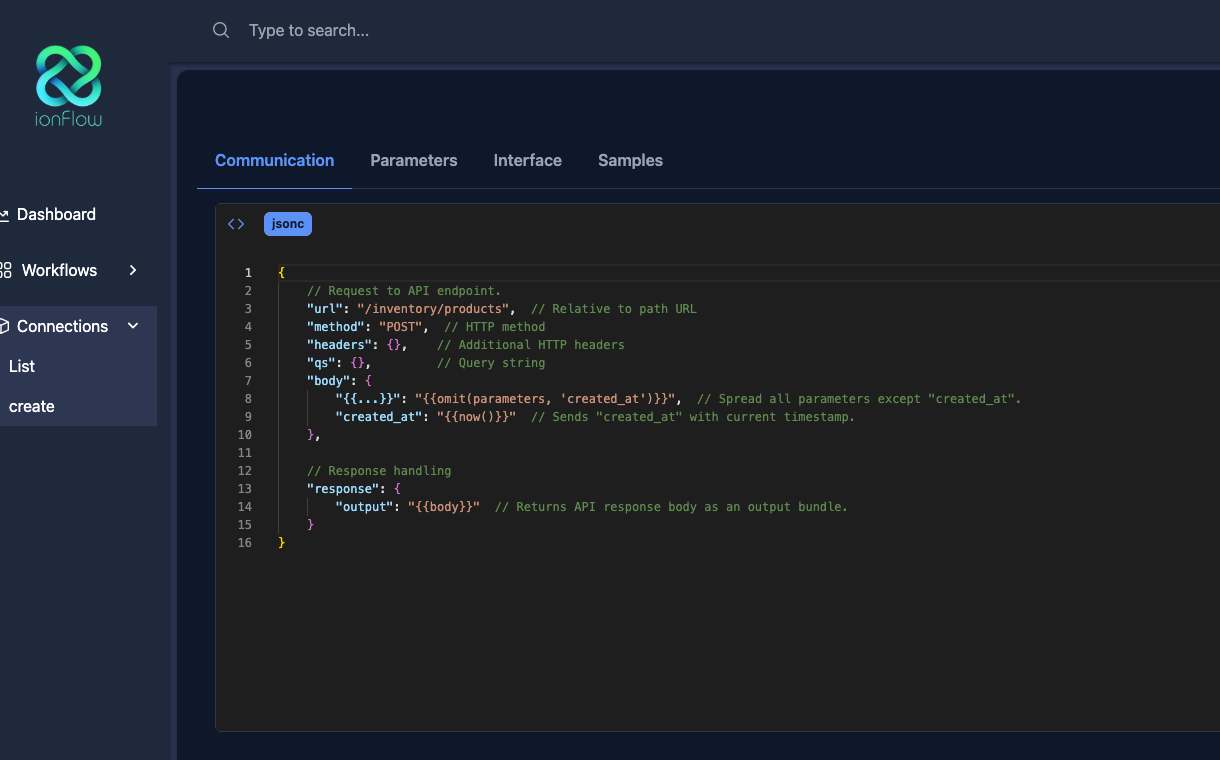
We have 4 sections to configure:
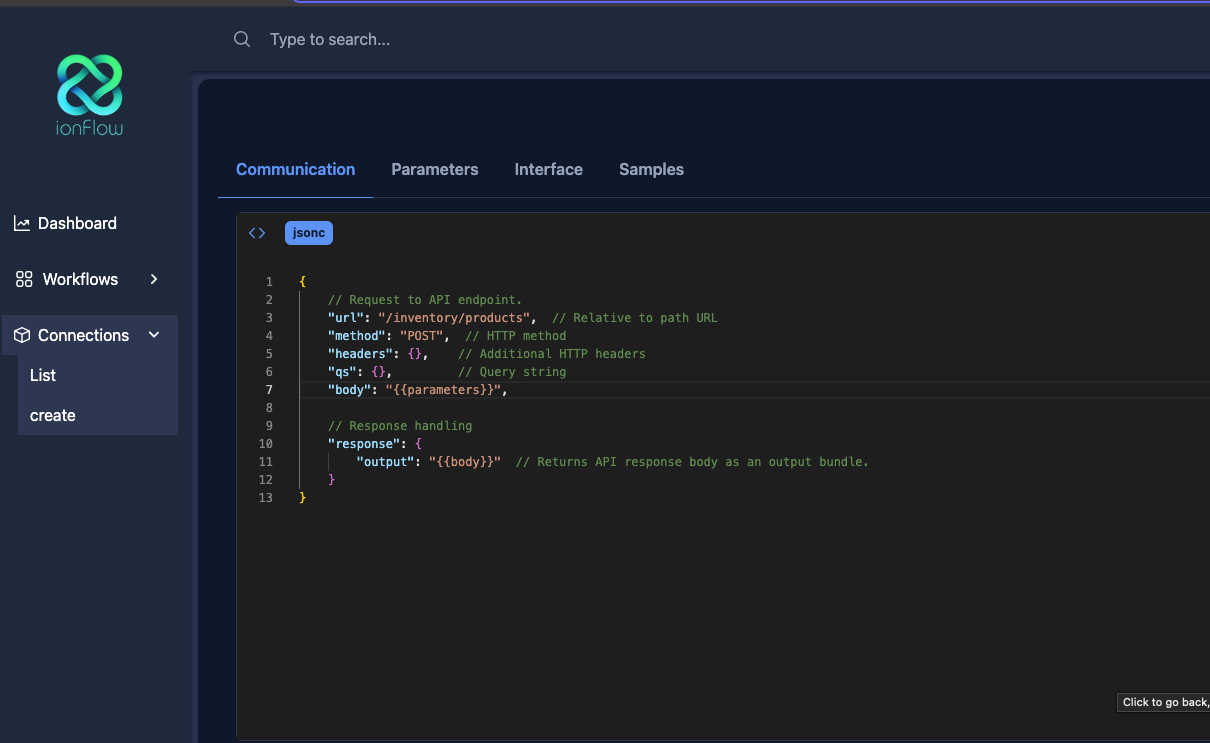
2.1. Communication
Section titled “2.1. Communication”It is the special configuration with which this specific module can work correctly, having as essential parts:
2.1.1. url:
Section titled “2.1.1. url:”It is the path (followed by the baseUrl) that references and uses this action, for example if I have the following action:
To get Products:
"url": "/products"Let’s assume that the baseUrl is https://api.example.com/v1, so the URL that will be referenced will be:
https://api.example.com/v1/products2.1.2. method:
Section titled “2.1.2. method:”It is the request method that the action will make, for example if I have the following action:
To get Products:
"method": "GET"This will reference the products action, and the action is found in the baseUrl, so if the baseUrl is:
Testing with a client like curl:
curl -X GET https://api.example.com/v1/productsIf the method were POST, the request would be:
curl -X POST https://api.example.com/v1/products2.1.3. body:
Section titled “2.1.3. body:”It is the content that will be sent in the requests (only for POST, PUT).
"body": "{{parameters}}"You can see that all parameters will be set to the body, but where? The reference is found in the Parameters section in the interface.
2.2. Parameters
Section titled “2.2. Parameters”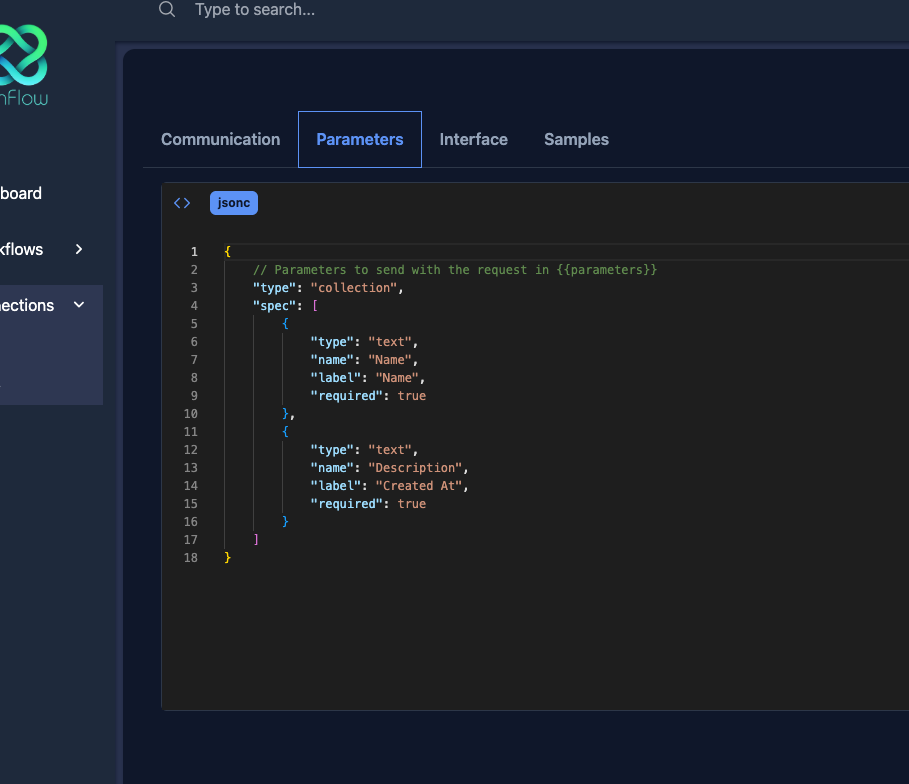
In this section of your module, follow the Spec convention to define the parameters that your module expects, for example if I have the following action that requires the following json structure:
{ "order_number": "123456789", "product_id": "123456789"}Built with the specification, it would be as follows:
{ "type": "collection", "spec": [ { "name": "order_number", "type": "string" }, { "name": "product_id", "type": "string" } ]}If you want content with an array, such as:
{ "order_number": "123456789", "product_id": [ "123456789", "123456789" ]}Built with the specification, it would be as follows:
{ "type": "collection", "spec": [ { "name": "order_number", "type": "string" }, { "name": "product_id", "type": "array", "items": { "type": "string" } } ]}These parameters are accessible in the body using the communication from the base section of the interface.
"body": { "order_number": "{{parameters.order_number}}"}This will reference order_number, and the result will be:
{ "order_number": "123456789"}In the body to send it with the request to the application, for example, with curl:
curl -X POST https://api.example.com/v1/products -H "Content-Type: application/json" -d '{"order_number": "123456789"}'You could simply pass all the parameters to deploy all the content with its typing, for example:
{ "body": "{{parameters}}"}What it will do is replace all the parameters content in the body, so the result will be:
{ "body": { "order_number": "123456789", "product_id": [ "123456789", "123456789" ] }}And the request will be, continuing with curl:
curl -X POST https://api.example.com/v1/products -H "Content-Type: application/json" -d '{"order_number": "123456789", "product_id": ["123456789", "123456789"]}'It also supports putting commands and mathematical operations inside these brackets ”{{}}”, this built with the commands core that allows adding programming and extending IONFLOW functionality.